- HubPages»
- Technology»
- Computers & Software»
- Operating Systems»
- Windows
Windows 7 Oracle 10g installation on x86 & x64: How to install Oracle 10g on Windows 7 x86 & x64 computer
Most Oracle 10g lover or the beginners of Oracle 10g, often fail to install Oracle on any Windows 7 computer. Before writing this tutorial, I also faced problem to install Oracle 10g on my Windows 7 computer. I searched through Google and lots of searched result I browsed but failed to discover. Later, form different forum posts and several video tutorials, I finally figured out how to install Oracle 10g on any Windows 7 computer. It's easy and straight froward to install Oracle 10g on any Windows 7 computer if you start carefully from the first steps. This page is basically a tutorial to install Oracle 10g on any Windows 7 computer. For the tutorial, I use Windows 7 Ultimate (Service Pack 1) operating system and Oracle 10g to install successfully.
Windows 7 Oracle 10g installation on x86 & x64 is very simple and straight forward to install. Most Oracle lover failed and lots of tutorials are present there in the web and always those mentioned that the installation is not easy and sometimes they say that is it is not possible to install Oracle on Windows 7 computer. Just follow the following steps carefully and complete the Windows 7 Oracle 10g installation on x86 & x64 computer:
Step 1: Configuring Oracle 10g setup file
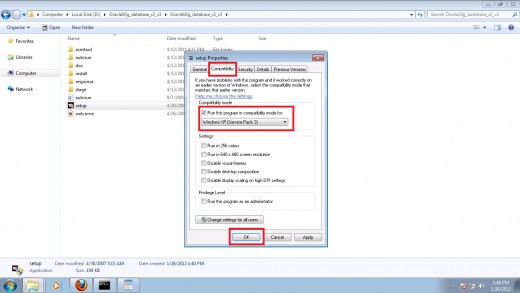
Download Oracle 10g or any installation software of Oracle 10g form CD / DVD and open the Oracle 10g folder. In the Oracle 10g software, you will find a setup file. We need that setup file to install Oracle 10g on any Windows 7 computer. Before installation, we need to porcess the properties of the setup file. Just right-click on the setup file and choose Properties option form the menu. Now the Setup Properties window will be opened. Click on the check box Run this program is compatibility mode for and choose Windows XP (Service Pack 3) form the drop down menu. At last click on OK button to complete this step.
Step 2: Starting the Oracle 10g installation
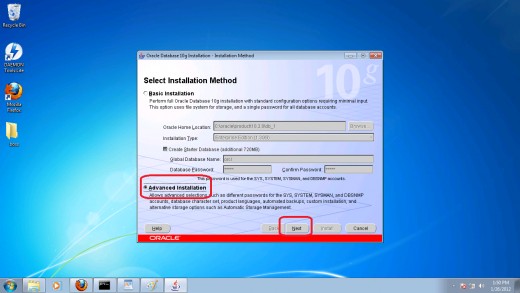
Double click on the setup file and the Oracle Database 10g Installation - Installation Method window will be appeared. Now, we need to select the installation method. There are two installation methods: Basic Installation and Advanced Installation option. As we are professional, we choose the Advanced Installation option to install Oracle 10g on our Windows 7 computer. Now, click on Next button to precess the next step.
Step 3: Choosing Oracle 10g installation type
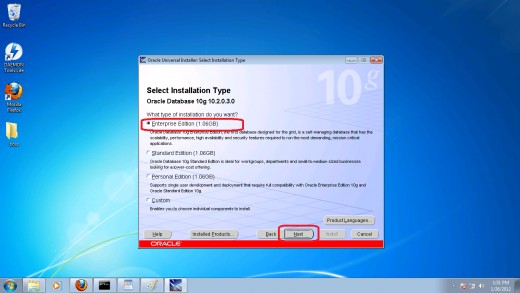
After step 2, you need to choose the type of installation of Oracle 10g on your Windows 7 computer. There are 4 types of installation: [1] Enterprise Edition, [2] Standard Edition, [3] Personal Edition and [4] Custom. We choose Enterprise Edition to install Oracle 10g on Windows 7 computer. After selecting that we choose Next to go further.
Step 4: Specifying home details
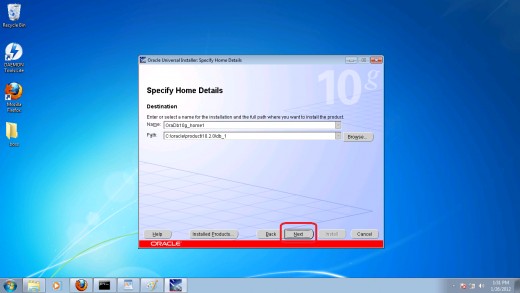
In this step, you have to enter or select a name for the installation and the full path where we would like to install the product. Write the name of the installation in Name field and put the location of the computer where we would like to install Oracle 10g in the Path field. When you completed mentioning the Name and Path of Oracle Home, click on Next button to install further.
Step 5: Fixing product specific perquisite checks
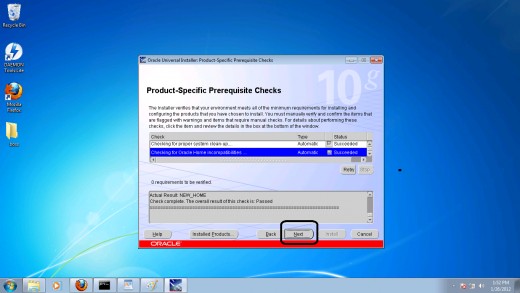
In this step, the installer checks all things and shows message. If everything is ok for installation of Oracle 10g on your computer, the Next button will be appeared. Click on Next button to continue Oracle 10g installation on your Windows 7 computer.
Step 6: Selecting a configuration option
In this step, you need to select an option to installation Oracle 10g of your Windows 7 computer. As we are doing a fresh installation on our Windows 7 computer, we select the option Create a Database. However, if you need to work other option like Configure Automatic Storage Management or Install Software Only. After completing the configuration option, click on Next button for the next step.

Step 7: Choosing a database type to configure
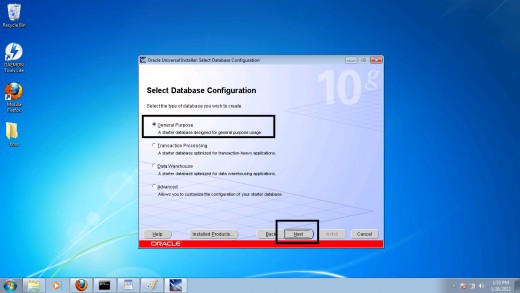
We are now ready to choose a database type that we would like to create. Choose General Purpose database type to start configuration. General Purpose database type is a starter database designed for general purpose usage. However, if you would need other type of database like Transaction Processing or Data Warehouse or Advanced type of database. After choosing the database type, click on Next button.
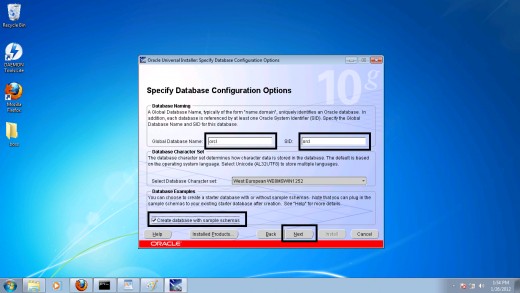
Step 8: Naming database type
After choosing the database type, it's time to name the database. So, we type orcl in the Global Database Name and orcl in the SID field. You may choose other name also as you like. Click on the check box of Create database with sample schemes as this helps us later to learn Oracle or practice Oracle command later. Click on Next button for the next step.
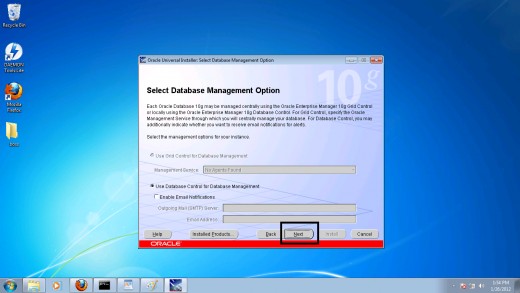
Step 9: Selecting database management option
Database can be managed several ways. For simplicity, we choose Use Database Control for Database Management by selecting the option and click on Next button for the next Oracle 10g installation option in Windows 7.
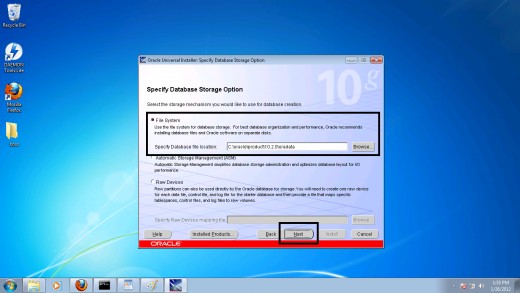
Step 10: Specifying database storage option
Now, we need to chose the storage option to store the database. Three types of mechanism [1] File System, [2] Automatic Storage Management and [3] Raw Device are available. We choose File System and then specify the location where the database will be stored. After choosing the database storage option, click on Next button for the next step of Oracle 10g installation in Windows 7.
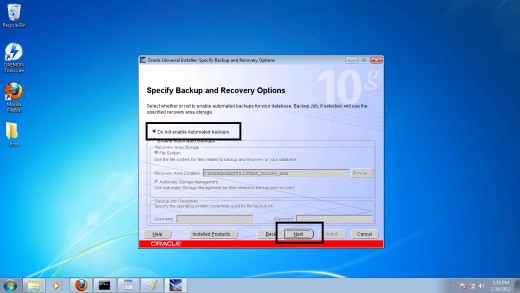
Step 11: Choosing a backup and recovery option
This step is required for backup and restoring purposes. We choose Do not enable Automated backups option as it's more good and secure to take backup manually. However, you may choose other option too. Later, click on Next button to go further.
Step 12: Configuring the password for Oracle users
This is an important step and we must be careful to configure this step. Oracle database has several users like sys, system, sysman, dbsnmp. You can specify password for each users. We choose the option Use the same password for all the accounts and type the same password to the Enter Password and Confirm Password field. After giving the password, we press Next for the next Oracle 10g installation step.
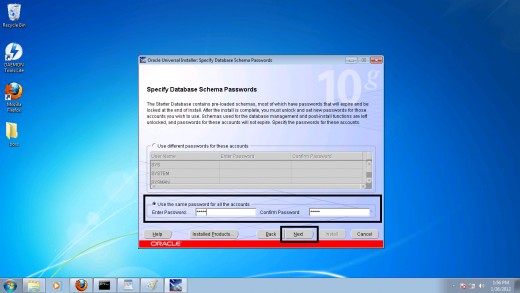
Step 13: Starting the Oracle 10g installation on Windows 7
When you successfully completed the previous steps, a summary report of Oracle 10g will be shown in the installation window. Click on the Install button to start installation of Oracle 10g on your Windows 7 computer.
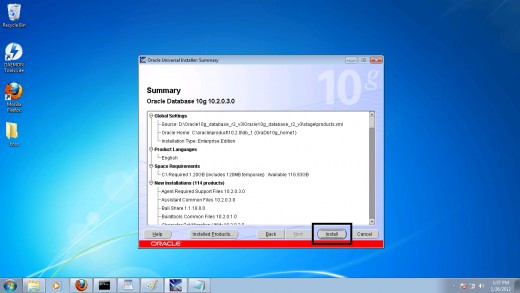
Step 14: Continuing Oracle 10g installation
When you click on the Install button, the installation of Oracle 10g will started and it will need sometime to complete installation. You will see a progress bar to install Oracle 10g on your Windows 7 computer. Please wait, until the installation finished completely.
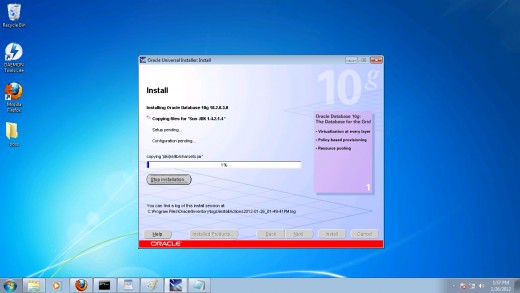
Step 15: Completing database configuration assistant
When the installation process is completed 100%, a Database Configuration Assistant window will be appeared. Click on OK button for next step of Oracle 10g installation of your Windows 7 computer
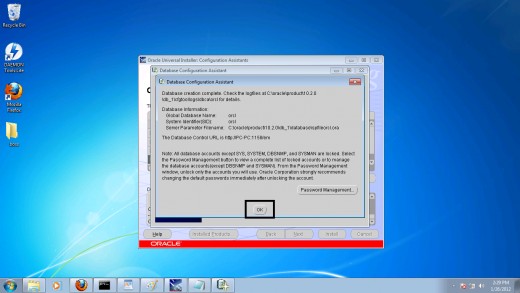
Step 16: Completing the Oracle 10g installation
At lats the End of Installation window will be appeared which confirmed you to the end of Oracle 10g installation of your Windows 7 computer. Click on Exit button to complete the installation window.
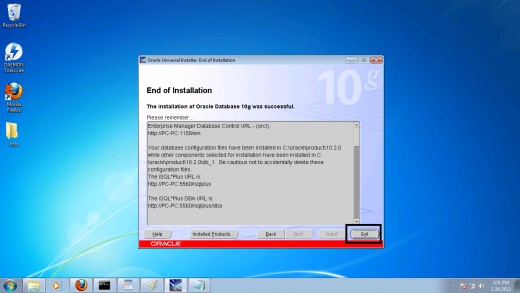
Click on the Yes button on the screen Do you really want to exit? for completely exit the installation window of Oracle 10g on your computer.

Following the above steps, you could easily complete the installation of Oracle 10g on any Windows 7 computer. Hopefully, this works nice and always give you success to install Oracle 10g on any Windows 7 computer. Furthermore, if you are in need any type of help, then just tell int he comment section to solve your query. At last, my request is that if you find this tutorial please share this tutorial with others as many students are facing problem to complete Oracle installation successfully at their first try.


